Introduction
The Language
At the core of Trainerflow lies a language with which one can express athletic programming of arbitrary complexity. We call this language the Coach Programming Language (Coach for short) and it is designed around a trainer-athlete feedback model.
The purpose of Coach is to allow trainers, of any kind, easily design, extend and test programs that athletes can then execute.
30,000ft view
When a Coach program runs it outputs a specification of what the athlete is supposed to do together with what (if any) the athlete is supposed to provide as feedback after he/she completes the specified action(s). This feedback then returns as input to the program and the program continues to output the next specification etc. This process continues until the program has no specifications left to generate.
Below is a schematic representation of how a program written in Coach roughly works.
Do not worry if any of the above sounds strange right now, the picture will clear up as you read more about the specifics.
A closer look
While designing Coach we ended up with a minimal set of abstractions that you may think of as the core elements of a Coach program. These are:
- Action is something that can be acted upon e.g.
BarbellBackSquat - Input is something that can be measured e.g.
repsorduration - Output is something that can be specified e.g.
weight - Exec is a named collection of specified outputs and measured inputs
that when applied will generate a (mentioned above) specification e.g.
squat. - Group groups several commands together, under a name, that when
applied will invoke those commands e.g.
dayAorweek1.
The above will do nothing by themselves because they are mere definitions. In order for the program to do anything meaningful you have to issue one or more commands:
- Specify attaches an output with a value to an action as part of the specification
- Measure sets an input to be measured by the athlete
- Apply invokes an exec or a group
- Repeat will invoke several commands repeatedly for a specified amount of times
- While will invoke several commands repeatedly for as long as a condition is met
- Ask will ask from the athlete to perform a measurement on an input
- Decide will choose the first condition (among many) that is met and will invoke all the commands that are associated with the matched condition
Not all commands will interact with the athlete. In order to gain a more concrete picture as to what these commands are all about it is advised to read more on the dedicated page for each command. But first let’s create a simple program to get you started.
My first program
To start things simple our first program will be a general strength and conditioning 2-day split program that will mainly consist of compound exercises. The first day will be focused to upper body exercises and the second day to lower body exercises. This is what we are building:
Day 1
| Exercise | Sets x Reps | Weight |
|---|---|---|
| Bench press | 4 x 8 | 60kg |
| Bicep curl | 3 x 10 | 25kg |
| Overhead press | 4 x 8 | 35kg |
Day 2
| Exercise | Sets x Reps | Weight |
|---|---|---|
| Back squat | 4 x 8 | 70kg |
| Deadlift | 3 x 5 | 95kg |
Again, this is an extremely simple program with no interactivity and no configurability i.e. the sets, reps and weight will be non-configurable. Also note that we will be defining everything from scratch, we won’t use the libraries that Trainerflow provides.
The SPDK
Assuming that you have registered with Trainerflow go to your programs and create a new program. If all goes well the Sports Programming Development Kit (SPDK for short) will open up. The SPDK consists mainly of a file explorer, an editor and a simulator that you can use to run/test your program.
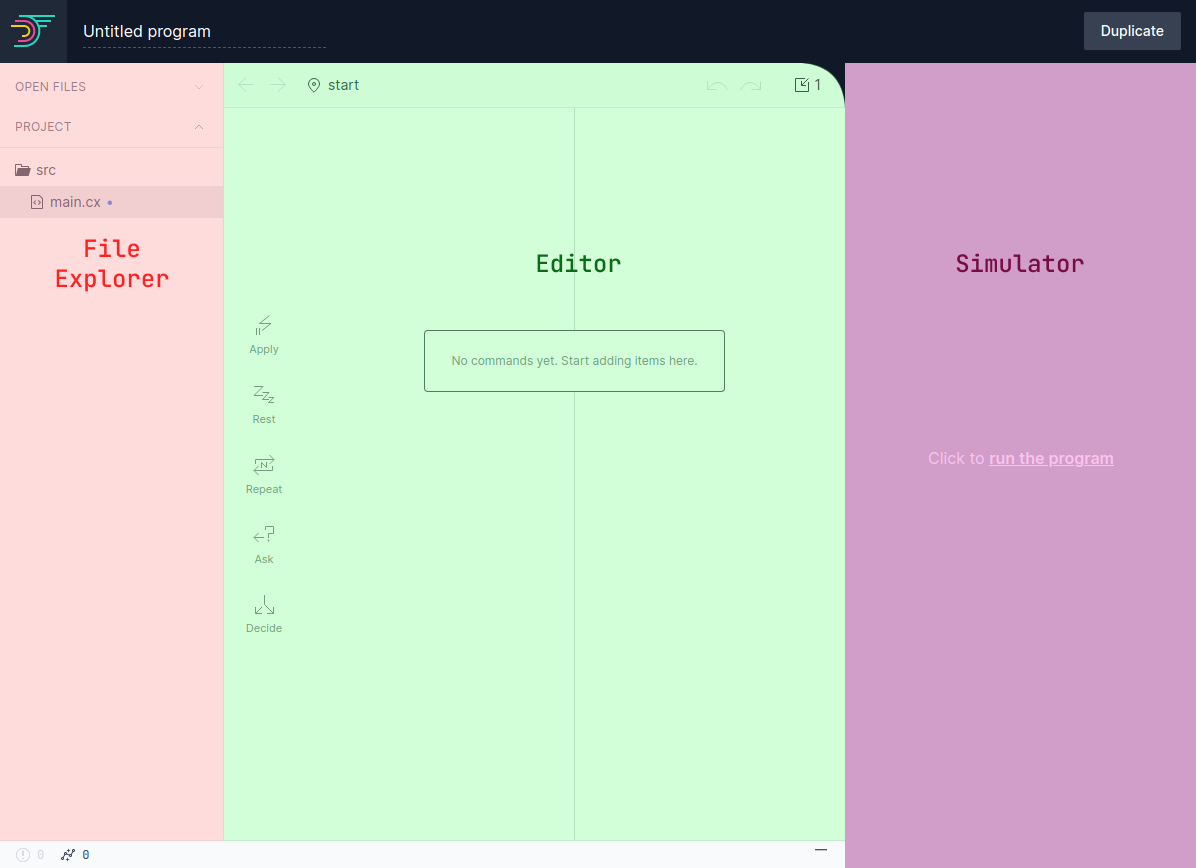
On the left hand side of the editor you can see the file explorer and in it a single file called main.cx. This file
is the entry point of the program (it’s what will run when you run the program).
Process
Group definition
Our program consists of 2 different days so the first thing we should do is to define 2 different
groups, say day1 and day2. To do that right-click inside the editor area and select New > Group
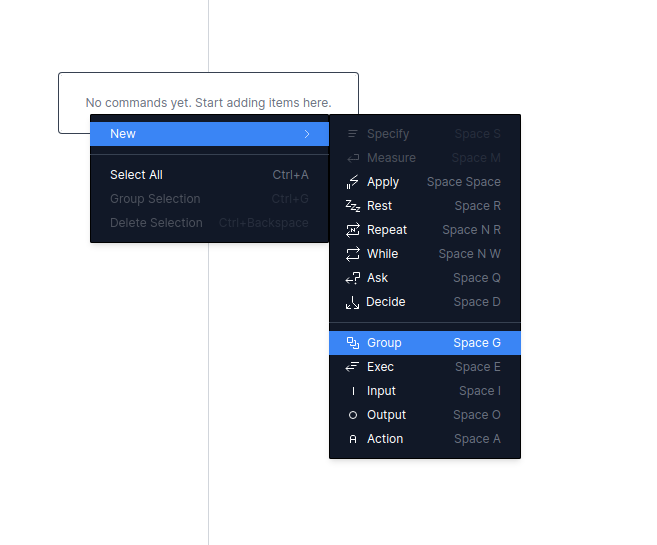
alternatively you could press Space and then G for faster access. Now we are presented with a new
group that we have to name. We give it the name day1 and click Create. We do this another time to create the group
day2.
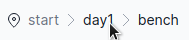
Next we navigate into group day1 by clicking on it’s name. We are presented a similar view but now at
the top we see that we are in the day1 group. Anything that you define and do in here is going to be
part of this group only.
Exec definition
The first exercise that the athlete should perform is a set of 8 reps of Bench press at 60kg. Generaly every exercise execution is
modeled as an exec. To define an exec either right-click and select New > Exec or press Space and then E.
A name should be given for this exec so let us choose the name: bench and click Create. Clicking on its name we navigate
into the bench exec (besides group an exec is the only other element that can be navigated into).
Action definition
Inside the bench exec we will specify that the athlete should perform the Bench pressaction for 8
repsoutput with 60kg weightoutput. So, first, we need to define a BenchPress action and the
outputs reps and weight. For the action either right-click and select New > Action or press Space and then A,
give it BenchPress as its name and click Create.
Output(s) definition
To define an output either right-click and select New > Output or press Space and then O. You see that
an output, besides its name, needs a type. For the reps output we select the type Number (because reps is a number), give it
reps as its name and click Create. We do the same for the weight output only this time we select Measurement as its type.
The Measurement type needs some further info namely the Unit of measurement. For the weight output the unit of measurement
is kg, so we type kg in the input box. We give it the name: weight and then we click Create one more time.
Specification
Now that we have both the action and the outputs defined, we can create a specification for the reps output. We either right-click
and select New > Specify or press Space and then S. A specification needs three things: An action, an output
and the output value. We select the BenchPress action, the reps output set 8 as its value (because that’s how many
reps we want the athlete to perform). After that we create another similar specification for the weight output but this time we
select the BenchPress action, the weight output and set 60|kg| as its value (read more on the values that Coach
understands).
Now we have, under the bench name, an exec that every time we apply the athlete will be given this specification: 8 reps of BenchPress at 60|kg|.
Application
Next we navigate out of the exec and into the day1 group by either clicking on the location at the top left corner of the editor
or by pressing Ctrl+↑.
Because the bench exec definition is just that: a definition, it does nothing by itself unless we apply it one or more times. To
invoke the apply command we either right-click and select New > Apply or press Space and then Space again. Here
we are presented with a list of all (visible at this point) execs and groups. We select the one we want to apply which is the bench
and then click Create.
Repeat
Although this instructs the athlete to execute one set of the exercise we need 4 of them so we can either invoke 3 more of those apply commands or we can invoke the repeat command. To do so either right-click and select New > Repeat or press the sequence Space, N, R. Now we enter how many times we want to repeat our commands, which is 4 and click Save. We see that there are no commands inside the repeat command so what we can do to move the previous apply command inside the repeat is to go over its icon on the top right and drag and drop it inside the repeat
Scope
This completes our first exercise: the Bench press, but day1 has another 2 exercises: the Bicep curl and the Overhead press.
We follow the above process again. We create 2 execs bicep_curl and ovh_press inside day1 and we navigate into bicep_curl.
We create an action BicepCurl and now we need the reps and weight outputs. These outputs have already been created
but they reside inside the bench exec so there are not visible inside bicep_curl. Remember? anything we define or do inside a
group or inside an exec is visible only inside this group or exec.
Because bicep_curl and bench are both inside day1 we could move the reps and weight outputs in day1 but because those
same outputs will be needed again at day2 the best thing to do is to move them at the start of the program.
We could do this by dragging each one of them to the start of the program
Now we can use them throughout day1 and day2. Going back into bicep_curl we invoke two specify commands for the BicepCurl action
one for reps (value 10) and one for weight (value 25|kg|) and then we repeat a bicep_curl application 3 times inside the day1
group, exactly as we did before with the bench application. We continue with the ovh_press that will specify, for an OverheadPress
action, its reps and weight accordingly. We conclude day1 by repeating an ovh_press application 4 times.
Rest
We will not be describing the process for the day2 group because it is identical with the one for day1. So assuming that we
have finished defining the day2 group we navigate to the start of the program because we still have to apply day1 and day2.
We have several options as to how often an athlete needs to train, but to keep things simple we will instruct the athlete to train
day1 and day2 alternately with one day of rest in between. For day1 we use an apply command and select the day1 group from
the list. For a rest command one needs to either right-click and select New > Rest or press Space and then R.
NOTE: this is the only “ready-made”, Trainerflow provided, exec that we will apply here. The rest exec is so common that we have
included it as a command.
We are asked to provide a duration for the rest command. We set the duration to 1|day|. Next we apply the day2 followed
again by 1|day| rest.
Program span
You might think that we are finished, but if you look closely we have specified only 4 days in total
(Day 1, Rest day, Day 2, Rest day). Let us say that the span of the program will be roughly one month long (really it can be
as long or as short as you like). This means that we need to repeat those 4 days for 30 / 4 times
(assuming that a month has 30 days). One way to do that is to click-drag and select those 4 commands and once selected right-click
and select Repeat Selection. This will put all the selected commands into a new repeat command
and then we can enter the expression 30 / 4 because Coach will calculate it for us.
Simulation
Now let’s see how we can run our program and test whether it behaves as it should. At the right hand side of the editor lies the Simulator that is not running. We can start the simulator by clicking on the Click to run the program button. If everything goes swimmingly 🤞 you should see the first specification in the simulator
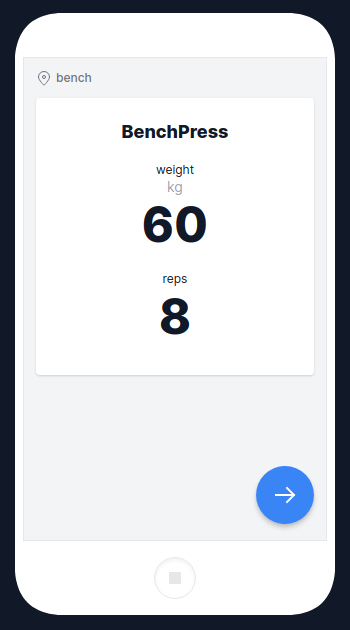
Clicking on the next button (bottom right) we can progress the program to the next execution / specification. You can press it a few times to see how the program progresses and to see if you missed any steps.
Final remarks
You may have noticed that in order to do something very simple, such as the program that we have been constructing, requires a lot of ceremony. Notice though that we have been defining everything from scratch something that you won’t normally do because you have the Trainerflow Standard Library available which has most of the things that you will need already defined and ready to use.
Next Steps
There are a lot of things that we didn’t cover here because this is just a very gentle introduction to how one can do athletic programming using Trainerflow. For example we didn’t see how one can use the measure command to require a measurement from the athlete, how to store the result of an apply command and use it later to take a decision, how one can use the provided Standard Library etc. It is advised to dig into the core elements and then read about the available commands. This will give you a good understanding of the internals.
We are planning to release a lot of video content on YouTube with tutorials, example programs and many more, so be sure to check it out regularly or subscribe.